|
|
|
Hooray for new belts properly tensioned. No more squeaks. 2 hours to do all four belts? Is that good time?
My current issue:
Got new o2 sensor. Got a new cat. Got a new downpipe. Got new gaskets.
The easiest way to do this on the ground, back yard mechanic style, would be:
1) pre-assemble everything on the ground & install as one unit
2) piece by piece starting with the new downpipe and working back
Of course, I will remove the old stuff first.
Have air tools, jacks, stands, & welder & help from a friend.
Looking for the easist, not fastest, way to get this done right, first time, with no leaks.
A little advice please.
TIA
--
Enem v15 cam, adj. cam gear, new head, trans cooler, stainless brake lines, e-fan, braces, IPD sways, 100% poly bushed, Bils, boxed front & rear arms, wagon lowering springs, FWD rims, 25/32mm adapters, powder coated stuff, zero mile-d, & more
|
|
-
posted by
someone claiming to be tjts1
on
Wed Nov 29 12:15 CST 2006 [ RELATED]
|
|
Where did you buy the down pipe and for how much? So far Bosal from FCP at $89 is the cheapest I've found. What kind of paint coating did you use? Thanks for the excellent write up.
Justin
|
|
-
|
|
|
i scored it from FCP for the $ you mentioned.
dont forget to get all the gaskets you'll need.
bolts, washers, lock washers, nuts too.
i used high temp grill/barby paint.
cleaned everything really good & sprayed it down with several coats.
probably will not last long but I had everything lying around so my effort was free.
--
Enem v15 cam, adj. cam gear, new head, trans cooler, stainless brake lines, e-fan, braces, IPD sways, 100% poly bushed, Bils, boxed front & rear arms, wagon lowering springs, FWD rims, 25/32mm adapters, powder coated stuff, zero mile-d, & more
|
|
-
posted by
someone claiming to be tjts1
on
Wed Nov 29 15:40 CST 2006 [ RELATED]
|
|
Sweet, thanks for the info. Mine started getting really loud about 2 weeks ago but the first exhaust shop (Midas) I took it too swore up and down that it was the engine, not the exhaust. I became so frustrated with the noise that I finally tore out the heat shielding...
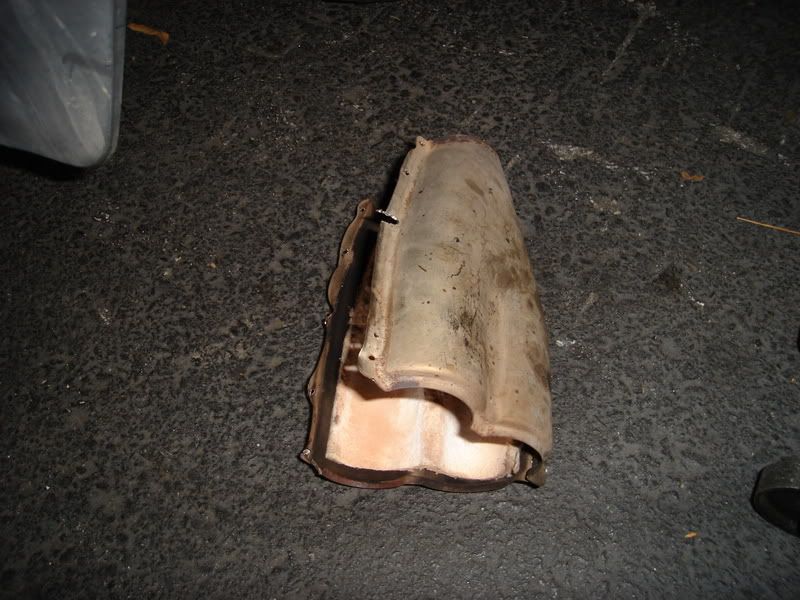
Only to find the welds where the 2 down pipes meet had split
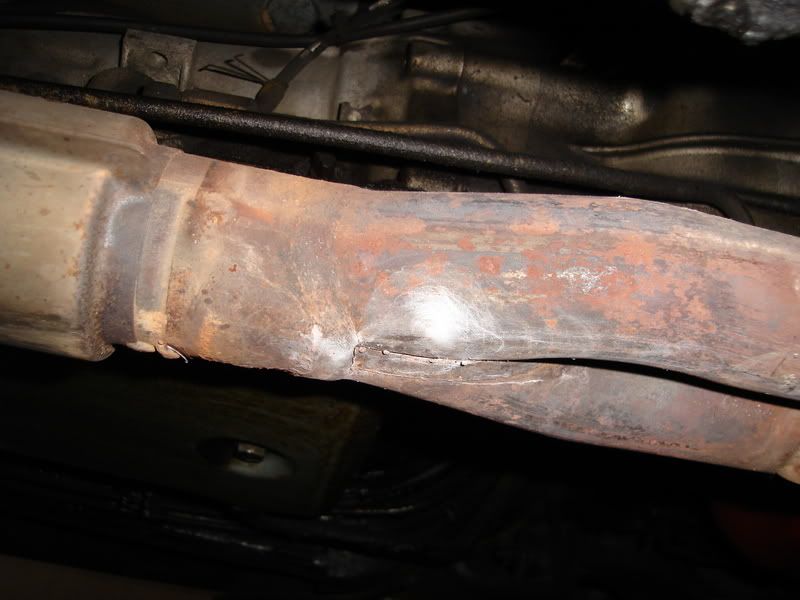
So finally monday I went to another exhaust shop and the weld was repaired within 5 minutes. But it turns out there is at least one more leak on the down pipes near the manifold flange which can't be reached because of more heat shielding. So the the only permanent solution is to replace the part. While I'm at it I want to also replace the rest of the exhaust with this Skandix kit.
Skandix exhaust
This kit has the axle pipe going over rather than under the axle. All 240s sold in the US had the pipe under, Swedish cars had it go over. Don't know why but there is less chance of contact between the axle and the exhaust when it goes over. The price is pretty good too.
|
|
-
|
|
|
if I had the top & bottom flanges I think I could make something nicer myself.
think there would be any benefit (for a n/a b230) of having one continuous pipe (or two joined at the middle into a 2.5" or 3" collecter type set up) versus the two?
if you have ever seen a b230 header you'll know what I mean.
the exhaust manny probably flows nice. I see this downpipe as a crush bent restriction.

--
Enem v15 cam, adj. cam gear, new head, trans cooler, stainless brake lines, e-fan, braces, IPD sways, 100% poly bushed, Bils, boxed front & rear arms, wagon lowering springs, FWD rims, 25/32mm adapters, powder coated stuff, zero mile-d, & more
|
|
-

|
|
Wow, what perfect timing for this question: I just ordered a new downpipe, and O2 sensor a couple of hours ago for *my* 1990 240. :) A new cat and everything else are in the garage waiting.
Only thing I can offer (that I heard through the grapevine) would be to get new fasteners for the cat/downpipe and downpipe/manifold connections. The copper lock-nuts at the downpipe/manifold are especially important. I also got new studs for the manifold just in case.
Thanks for bringing this up!
-Ryan
--
--------------------------
Athens, Ohio
1990 245 DL 130k M47, E-codes
1991 745 GL 280k (Girlfriend-mobile)
Buckeye Volvo Club
|
|
-

|
|
I did my mani and downpipe last month. I got the 10MM copper nuts from the dealer but they wouldn't fit. Well one wouldn't fit . The one by itself at the engine side. The nuts were flanged and there wasn't enough room for the flange. The originals were much thinner so I used one over again.
I pulled the entire exhaust cleaned it all and replaced all gaskets and hangers. Its real easy. The downpipe nuts are the most challenging. It got to them from underneath but had to heat them up til they were orange
--
91 Brick turning 400,000 this month
|
|
-
|
|
|
when i did this proceedure i found that everything went quite well untill I had to remove the cat pipe, which is a male end, from the first muffler's female end. i decided to cut the pipe with a hack saw and then try to collapse the remaining pipe with a cold chisel and then remove it with pliers. I figured that it would be easy as the first muffler back was only one year old and in great shape. after wrestling with this heap for 4 hours trying everything to get the male end out of the muffler, I finally ended up taking the rear muffler back off as one whole unit. Then after clamping vice grips on the remaining male end of the cat pipe, I was able to use a generous dose of 5 kilo hammer to wrench it off...mind you this took nearly 30 min of continuous pounding...it was a nightmare. if I had a sawzall and a nice thin blade i think that i could have cut a chunk out of the male piece and more easily removed it. A slide hammer may have been a help but given how well fastend in the piece was I have my doubts. getting all of the pieces to line up for reinstall was another fight. I ended up installing the head pipe (no prob) then reinstalling the 1st muffler back as one piece, then installing the cat to the rear muffler. At this point the head pipe flange and the cat flange were approx 3 inches out of alignment. I then took some nylon tie down straps and looped them around the cat and hooked them to the fram of the car. using those straps and a ton of pulling force, I was able to pull the pipes into alignment and bolt them together. this all took me approx. 10 hours. it is a real pain in the ass and I would have paid the $200 that the muffler shop wanted to install it had I known then what I know now. I never did get the head pipe to mount to that bracket at its bend. make sure that your plugs are all tight too, the one is the cat and the one in the head pipe. good luck and if you possibly can...avoid this project
|
|
-
|
|
|
Yesterday afternoon I spent a few hours removing the old header/downpipe on a 1984. The nuts on the exhaust manifold's studs were good, and I just wrenched them off. But the bolts/nuts (no studs, and I wondered about this) between that pipe and the cat were rusted solid, so (not having an oxyacetylene torch to burn them off) I had to use a cutting disk on a drill to cut off the old bolts -- it took a couple of hours.
Today, installing a new downpipe, it was done in about an hour.
The car is on ramps in the front -- rear is on the ground.
I slipped the pipe down through the engine compartment, and used some rope to tie the top of the header to near the exhaust manifold -- that kept it suspended, instead of falling all the way down.
I got under the car and, with another rope, tied the rear end of the new pipe to the cat's mounting flange. Now, the pipe is loose and can be pushed around a bit to maneuver, but it's approximately in its right position.
Working from above, I reached in the engine compartment and lifted the pipe onto the manifold's studs (don't forget the gasket, I almost did :-), and then began finger tightening the nuts to the manifold. I also prefer to put "high temperature" antiseize paste on everything (for a future job). From above, I wrenched one nut onto its stud and snugged it. Then I had to get under the car to ratchet, with a long extension, the other two nuts. I tightened them fully, and then tightened up the first nut (again) from above.
Then, also underneath (of course), I bolted the back of the pipe to the cat. Very straightforward, and easy!
Hope this helped. It mainly obvious, but I think my use of the rope to loosely hold the pipe in place may be helpful.
Regards,
|
|
|
|
|
