|
|
|
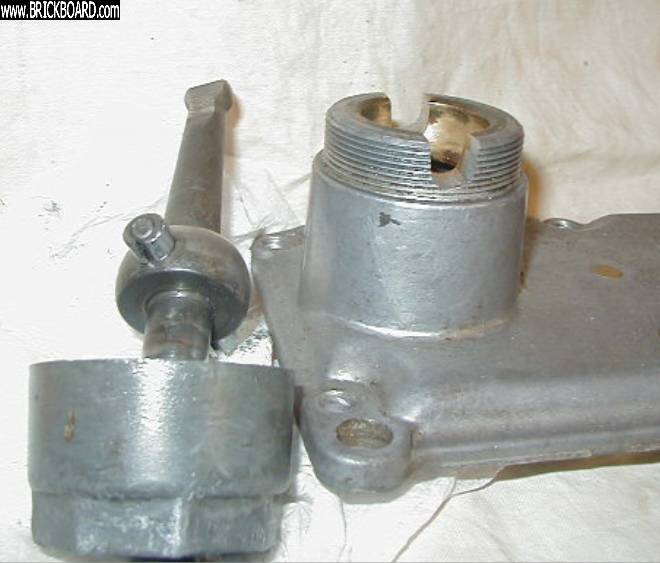
So, say a person wants to replace the gasket and rear seal on an m40, out of a 66 Volvo 122s. The transmission is out of the car. He stands the M40 on end, bellhousing down, removes the flange, and pulls out the 4 bolts that hold the rear cover to the main case. He manages to pry up the rear cover about 1/4 inch, giving him access to the area where a new gasket should go. Clean, cut gasket, install, bolt down the rear cover. Also rinse out with gasoline, no silver specks.
But something is wrong. There appears to be no neutral. Some gears are locked up. Other gears seem to operate as if there was only 4th gear...rear shaft turns at the same rate as the front shaft. Just turning the front shaft in any gear feels wrong. Too much resistance.
This is a true story. Any suggestions as to what happened?
|
|
-

|
|
Is the spring and ball in the end of the gearstick still functioning properly?
--
69 142S Overdrive + 69 164S Manual
|
|
-
|
|
|
Paul, while waiting for parts I gave more thought to your mention about the spring and washer on the shift lever. I took loose the snap ring on the bottom of the chrome sleeve. But I have not been able to pull the sleeve off the steel bar...if it even comes off. How else can I get a replacement spring in there if I wanted to? Does the steel pin drive out?
|
|
-
|
|
|
I don't know why you are playing with that area, I was talking about the ball and spring in the sperical part at the bottom of the stick, this part will typically be the most worn along with the slots in the in the cover that makes the stick sloppy. Is there a little pring loaded ball in the bottom or an empty hole?
--
|
|
-
|
|
|
Paul, Thanks for your reply. Your post says, "I was talking about the ball and spring in the spherical part at the bottom of the stick...". Yes, so am I. This is the area where there is a brass round hollow dish that bears the round steel semi-sphere near the bottom end of the shifter stick. You go on "this part will typically be the most worn along with the slots in the in the cover that makes the stick sloppy". Gotcha. As a measure of wear, there remains a strong sixteenth inch of brass, thickness, at the bottom of the brass bowl. As for the slots, they look pretty shot I think. I have Danny's (?) post about using pieces of a roll pin and enlarging the slots to take out slop here, and I have bought a 3/8" roll pin to give it a try. You ask, "Is there a little spring loaded ball in the bottom or an empty hole?" I see neither one...The shifter stick goes on down to the slotted plate, and that has a spring to make you think before you hit reverse. Looking upward on the stick there is the spring that pressures the stick down into the brass bowl.
The reason I asked about taking the stick apart is to try installing a washer above the spring, for more pressure (tightness) on the stick. I am on to the engine now so there is currently no progress on the M40. I have the parts, and it will happen soon. I appreciate your interest in helping. The part about the "little spring loaded ball " has me wondering... Rick H.
|
|
-
|
|
|
I think it must be the M400 that has the anti-rattle ball and spring in the end and I am confusing them.
I like what Danny has done, it looks quick and easy. Get yourself a compressor and a $20 die grinder to do it. I've done it the hard way, building it up and grinding back down to standard, very tedious.
--
An alternative falsehood is an alternative fact in a post truth world. - TG.
|
|
-
-
|
|
|
Right Al. That is what I want to do. Looks like your roll pin is a tight fit on the shifter, and then the roll pin rotates inside the slot of the top cap. Which you must have filed or drilled oversize. Is that correct?
|
|
-
|
|
|
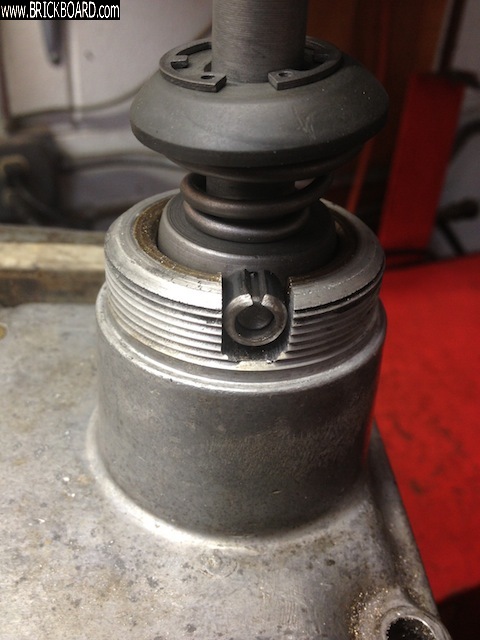
I searched brickpix library and found this picture from 3+ years ago, in which it appears that roll pin is not in contact with bottom of slot (in neutral position).
|
|
-
|
|
|
Danny, is your rollpin a drive-on fit to the shifter's original pin? Or does the original pin rotate inside the rollpin? I need new files. And drill bits, I'm planning on using them too, maybe more sideways than straight on.
|
|
-
|
|
|
Remarkably, the roll pin was pretty much a hand press on fit. I may have had to pry it off, but it didn't have to expand to go on. I believe I got it out of one of those pull out drawers in a hardware/lumberyard, where they have stainless screws, jesus clips, brass machine screws, rubber washers, etc. etc.
Take the shifter with you so you can check the fit. You don't want slop.
I think I just cut short sections with a cutoff wheel and then cleaned the ends up on a grinding wheel.
Forego the use of drill bits, sideways as you say. Just files, steady hands and patience. It's just aluminum and brass.
For others, here's the link to the original thread:
https://www.brickboard.com/RWD/volvo/1574484/120-130/trans_cover_slop.html
|
|
-
|
|
|
Yes, I did post sometime back about fixing slop in a worn trans cover with roll pin sections. It's a little tedious - buy good files.
Keep in mind that you are trying to re-center the slot position, as it has been "moved" by the wear that's caused the slop.
The "ball" wants to be centered on the cup and in contact, via grease. So not only do you have to carefully file the slots wider - they also have to be deeper by the thickness of the roll pin, to re-establish the correct location of the two parts to one another.
You want the roll pin pieces to be as long as possible, but not so long that they protrude into the threads of the cap. Put the split facing up, obviously.
I centered and widened the slots with flat files and then worked on the depth with rat tail files. As it "drops" down into the cup, it becomes apparent how "uncentered" it is, and so you correct - file the opposite side of the slot to where the ball is contacting the cup. It was a matter of filing and fitting, filing and fitting. Also, I didn't replicate the beveled corners in the bottom of the slot - I went with rounded.
I may wrong about this, as I'm sure whether the pins rest up from the bottom of the slot or not (in neutral)
Maybe this is something a machine shop could do for not too much money.
|
|
-
|
|
|
Paul Well, judging from the wear indents on the brass bowl under the ball, looks like the shifter has always ridden tilted toward the passenger seat. But that is not new and it worked fine before I began putting a new gasket on the rear cover.
Everyone, thanks for the replies. Today I hung up a new flourescent shop lite above the work bench. Getting ready to disassemble the box following VClassic's transmission instructions.
|
|
-
|
|
|
You probably have a shift dog(s) that has be dislocated and that could be 1st/2nd dogs or 3rd/4th dogs.
If we need to change the rear gasket, we pretty much have to take the whole transmission apart with the mainshaft assembly being the only real major section that doesn't have to be disassembled.
And if I am right, you will now need to partially or completely disassemble the mainshaft to correct the shift dogs.
--
Eric
Hi Performance Automotive Service (formerly OVO or Old Volvos Only)
Torrance, CA 90502
|
|
-
|
|
|
It can be done, it will just take some patience and a delicate hand.
Once they are off the retaining ring, the mainshaft has to come out again, maybe not fully, but enough to get at the synchro ring.
--
MPergiel, Walker, MI
|
|
-
|
|
|
thank you berp. Can you tell me more about these dogs? Are they on a shaft, or where?
|
|
-
|
|
|
In this picture that are the little bits at the lower left. Unfortunately, you cannot set them right without moving one end of the mainshaft. They are held in place with the round spring, and when that spring slips off the dog it prevents the locking ring from sliding correctly.
When I was learning, I had to repeatedly remove and replace the front part of the main shaft, tapping the bearing out, to get the dogs seated correctly and the locking rings to slide. BE SURE you screw down the front cover fully before testing that the sliding rings move. The dogs will slip off the springs VERY easily.

--
MPergiel, Walker, MI
|
|
-
|
|
|
Don't forget to fit the dogs the right way round. Note the raised part isn't central.
https://www.brickboard.com/RWD/volvo/1635718/444-544/m40_gearbox_help.html
|
|
-
|
|
|
Thanks berp. Those 3 "larger dogs" (as they are called in olof's catalogue,) all 3 were broken. A bite had been taken out of the side near one end. So they dug 3 slim grooves into that synchro. Also that spring was pretty well shot, bent around a notch. And one of the slider rods was locked in gear by the ball being glued down in the hole. Trans has been sitting for 6 years...and back then it used to grind into one gear, I recall.
Derek, I am glad to have your guidance for which way is which on the dogs. I took pictures of things as I disassembled, but I'm not sure they will help with this part.
|
|
-
|
|
|
Not what I wanted to hear, but thank you Eric. I will hit the books...my green book, Haynes, VClassics site. Already from online I am learning about "dogs". So far I think they are movable gears that selectively engage one of two adjacent gears to transfer power to a shaft. Maybe I will look around for a transmission to install temporarily, too. I am assembling a B20 for this car, which has sat for 6 years now. It has become my daily driver since my other car died. So I would like to get it running soon.
|
|
-

|
|
I rebuilt my first M40 with guidance from VClassics article.
It's really not terribly difficult if you're somewhat mechanically inclined.
Parts can get pricey though.
I found the effort to be rewarding.
|
|
|
|
|