|
|
|
I welcome your likely laugh at my failure to find these two pathetically trivial questions asked or answered anywhere precisely — whether in my reading of your 7-9 hundred series Maintenance FAQ (beginning with its oldest and earliest entries), or my rummaging throughout your website using either your own search device here, or those of google, bing, yahoo, dogpile, or anything else.
(1) —>>> Please tell me how to create sufficient lateral clearance to remove and reinstall (rather than replacing) — without distorting, damaging or destroying anything — the rearmost muffler, or even so much as the tail pipe itself, now that I've unscrewed and removed the four Kroil-soaked 13-mm nuts and their two u-clamps, and slid the tailpipe to port (to the left) only an inch or two, till it kisses the interior panel abaft the wheel well that obstructs any further movement, without exposing the end of the muffler's outlet.
I suspect that in another inch or so the tailpipe would slip all the way off.
Were the muffler's two blocky-looking hangers not holding it in place, I suspect but do not know that, the muffler would slide freely away from the fore-and-aft assembly of exhaust-pipe/resonator/exhaust pipe/exhaust-manifold that I would rather not wobble back and forth.
(2) —>>> Okay; I know: this second question is silly.
Please indulge it for me, just to help me play it safe.
How to remove the muffler from its hangers is not entirely obvious to me as I lie there on my creeper beneath it on my back.
Kindly show and tell your simple-minded servant (me) whatever you can about the non-destructive disassembly or simple separation and replacement of the muffler please.
XPEG_656 in Southern California
1840 Sun 19 Mch 2017
I've loaded two images up to your Image Library, entitled
Tailpipe, Loosened but Its Removal Obstructed (a) at the joint, port side, looking aft,
and
Tailpipe, Loosened but Its Removal Obstructed (b) at the obstruction, port side, looking aft,
but how to coax this form to cite them here and to link you to them directly eludes me now.
|
|
-
|
|
How to remove the muffler from its hangers is not entirely obvious to me
The best way is not to pry the rubber pieces but to unscrew the pins from the body.
Here's the pin (one of two) by itself.

See the facets? Support the axle pipe per Art's suggestion. Then find the correct size open end wrench and remove the pin on the right side. You then should be able to drop the muffler enough to remove the hanger and then just pull it off the of the other pin.
--
'80 DL 2 door, '89 DL Wagon, '15 XC70 T6
|
|
-
|
|
|
What bulletproof said. I just figured this out on my first venture into exhaust repair. It was only after installing a new IPD sport catback, re gasketing the header, and installing a new bosal downpipe that I realized last weekend that my 30 year old cat is literally empty. Unintended straight pipe. So now I've done the unscrew the hanger trick twice, and I may have to do it again to line up the new cat.
I will join the chorus above in saying that that you may want to lube the holes in the rubber hanger. That saved a lot of fight against the hanger undoing my screwing and unscrewing of the mount.
Oh my, the multiple entendres.
|
|
-

|
|
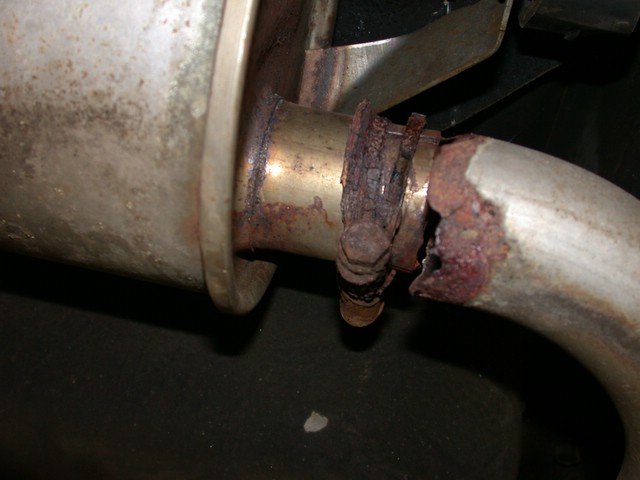
Nel has given you the truth, at least as it appears in our salty rust-belt perspective. The patch you want to apply is, if like how ours die, at the inlet side of the muffler where it joins the axle pipe.
Now, apply the drying SoCal climate to the rubber hangers, and they just might not survive wrestling them off of the four pins. You might want to at least have a pair of those handy. Prying the pins out of the hangers all by yourself is the second most tricky aspect of this job. The first is getting them back in.
And you're right to be mindful of the stress that letting it hang unsupported would lend to the head pipe and its attachment to the bell housing bracket, and if that isn't there any longer, the head itself. Put something underneath to support it.
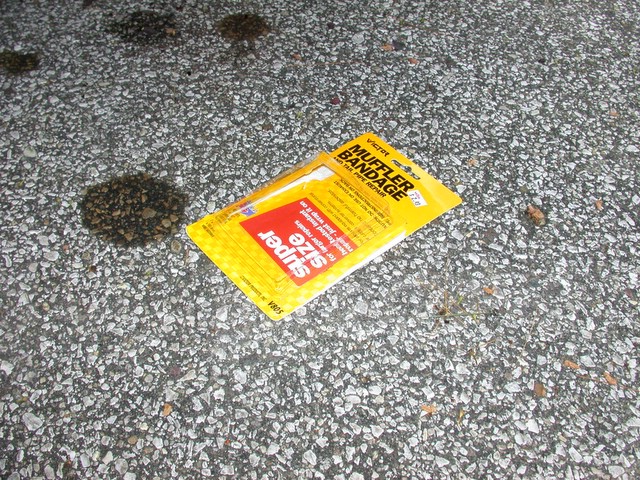
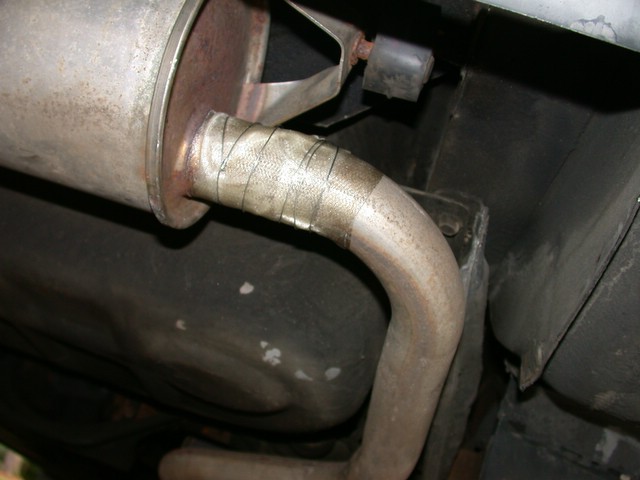
You might be able to do a "muffler bandage" patch if you truly don't want new cat-back exhaust on your neighbor's car. I was amazed at how this product held up after using it 1000 miles from home one summer. These pics were taken in a Walmart parking lot.
--
Art Benstein near Baltimore
The Art Collector's Wife:
A New York attorney representing a wealthy art collector called and asked to speak to his client. "Saul, I have some good news and, I have some bad news."
The art collector replied, "I've had an awful day; let's hear the good news first."
The lawyer said, "Well, I met with your wife today, and she informed me that she invested $5,000 in two pictures that she thinks will bring a minimum of
$15-20million. I think she could be right."
Saul replied enthusiastically, "Well done! My wife is a brilliant businesswoman! You've just made my day. Now I know I can handle the bad news. What is it?"
The lawyer replied, "The pictures are of you with your secretary.”
|
|
-
|
|
|
Reviving this post. But looking at Art's pic I think this is the way to go when replacing with a new exhaust. Just use the muffler bandage first to add strength to the joint before adding the clamps. it may buy MORE time before it breaks down.
|
|
-
|
|
|
A squirt of penetrating oil or silicone on the rubber donuts and hangers helps them slide off easier. -- Dave
|
|
-
|
|
|
When I put new ones on (rear muffler) a bit of slippery snot (dish soap) does indeed save a lot of muscle. No problems yet removing those on the front muffler, but installing the aftermarket (Starla) donuts is never a piece of cake for me.
--
Art Benstein near Baltimore
An artist, and architect, and an engineer were at the bar discussing the relative values and enjoyment of mistresses and wives.
The artist decided, 'I would much rather have my mistress! It is always exciting and a little bit naughty and different.'
The architect said, 'I much prefer my wife. I like the stability and certainty.'
The engineer said, 'I like to have both. That way, my wife can think I'm with my mistress, my mistress can think I'm with my wife, and I can get back to the plant to get some work done.'
|
|
-
|
|
|
I have found a great way to install the front muffler doughnut mounts.
I have been wrestling with these confounded mounts on Volvos since the early Eighties. And the new cheap aftermarket doughnuts are stiffer yet.
I bought a stainless steel over axle exhaust and it has been quite "character building" getting it on the car and not vibrating on the late (1992) 240 wagon crash impact panels adjacent to the fuel tank.
I needed to modify the expensive system and I got it to work and only an occasionally clunk with one new doughnut and one old... Then the old doughnut looked so cracked from age I knew it wouldn't last and needed replacement.
The bracket on the new stainless front muffler is quite tight in clearance so working on ramps made any hope of stretching aftermarket doughnuts onto the assembly well beyond my capabilities.
I saw Art used ny-ties to force the muffler into a position that is closer to success and we discussed the possibility of removing the bolted-on mounts from the car to help maul the parts into position. I noted the fine chamfer on the bolts that hold the car bracket, so with that in mind I figured a little offset against a new stiff aftermarket doughnut might not cross thread and create a real mess.
Then came the Eureka moment-
I have little come-alongs that use nylon webbing that are used for tying down cargo.
They have a ratchet mechanism that snugs up the webs.
I secured one end around the new muffler (close to the end where it is stronger) and hooked it to the chassis jack lift plate. The other end I tied off. Using the ratchet I was able to pull the muffler against the tough new doughnut enough to line up the other bracket's holes and install the mounting bolt!
Very simple and a bare minimum of disparaging thoughts!
Downside? One must disconnect the Cat-pipe from the head-pipe in order to allow the needed motion of the pipes.
My 240 has a pair of triangular plates that hold the head-pipe to the Cat-pipe.
For many years I have used stainless steel bolts with two nuts separated by a lock washer on this union…
So for me it was a very simple disconnection- and on my 240 there is no gasket needing replacement at this union.
Bottom line?
When installing your new stainless or temporary exhaust system- use the ratcheting strap to install the twin doughnuts first. Then connect the rest of the pipes-
Working alone this went fast and easy.
|
|
-
|
|
|
You're going to need a very long screwdriver or pry bar for both tasks. Place your pry bar on the rear muffler hanger, passenger side, and just pry it over until you can slide the muffler off of it. Once it is off you can then move the muffler over from driver to passenger side and get it off the other hanger. With the center muffler it get a bit tougher but you will be doing the same thing more or less. Prying the muffler off of the rubber donut. Putting it back is a PIA. IIRC there are 2 hangers. What happens is once you get one on there it makes it tougher to pry the other one on. You will need to find a spot under the car to leverage you pry bar and slide the muffler onto the hanger. If you only get one on there it will hold.GL.
|
|
-
|
|
|
Wow. Det var en sådan snabb svar! Tack för din vänlighet, Nel.
Okay; I know: Swedish may not be the lingua franca in your neck of the woods, or mine, but I thank you so much for such a speedy reply!
Thank you for your kindness, Nel.
I'll stumble back out into the southern California cold that numbed my fingers so much as I posted my question earlier that I could feel nothing whatever beyond needles and I could barely get a grip on my phone.
Do I understand you to say that
(a) the passenger-side hanger can be deflected outward without damaging it,
and that
(b) the muffler while still attached to the entire assembly
(forward from there all the way up to the head)
not only may be lowered but also may be moved to starboard
(to pull it from the portside hanger)
without damaging any part
of what I had thought should be and remain
a reasonably rigid exhaust assembly?
That surely sounds like the right way to go, Nelson,
but I feel concerned about deflecting that long lever created by
an exhaust assembly attached firmly to the head.
I'd hate to have my 82-year-old neighbor to discover I've hurt her more than helped.
I intend to patch the muffler out in the open, if that seems feasible on closer inspection, then put it back in place.
If that patch fails, I contemplate a "cat back" ( as I think you folks call it) replacement
with an $88 Starla kit from which I would exclude the pipe intended for that which is welded to the converter. My welding skill is nearly non-existent, even if I had the equipment and could use it safely anywhere near a gas tank.
XPEG_656
2220 Sun 19 Mch 2017 PST
|
|
-
|
|
|
Don't bother to patch it. The weak points are the small sections of muffler tube that extends from the mufflers. Usually the connection on the passenger side going into the muffler is where it will break. Just get $88 cat-back system and be done with. If you see any rust at any of the joints beware. It may break right there. The pipe to the cat converter is held with a clamp, not welded. But by now it may be fused to the converter and you will have to carefully use a chisel and maybe a saw to cut it/ section it and then remove it without destroying the converter.
|
|
-
|
|
|
Thank you again, Nel, for your thoughtful and thorough information.
|
|
-
|
|
|
What wasn't mentioned regarding the removal from the rubber hangers---spritz some lubricant on the pins WD40, white grease , etc. You may have to stick a thin scewdriver in one end to get a gap for the lube to work. The hangers are flexible enough for you to manipulate them with your hands if they're allowed to slide on the pins.
The pipe from the CAT to the front muffler is part of the CAT. Loosen the clamp and soak all the connections with a penetrating agent. Massage (hit with hammer) the connection at the front muffler--smacking it all around to expand the metal. It will come loose from the pipe. If oxy-acteline is available -- a faster way to expand the connection. The pipes need to rotate for the connections to come loose. Have fun :-( -- Dave
|
|
|
|
|
