|
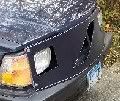
My '89 245 has significantly yellowed and scuffed headlight lenses.
I've undertaken to improve them.
First step: Conquer the rusted-on nuts holding the headlight assembly onto the radiator bracket.
These were so severely frozen that they would not come loose using a combination of PB Blaster, WD-40, and locking pliers on the exposed tip of bolt while turning the nut with a wrench.
I used a Dremel-type tool (small rotary grinder/drill) with a cutoff wheel to cut off and grind off the nuts. That did it. Assembly slid right out of the car after opening the !#&@^! electrical connector for the small bulbs.
Next was removal of the reflector basket from the plastic frame - some notes on this and on stuck aiming adjustment screws further below.
Rusted bolts then could be pushed out of their seats in the plastic headlight assembly. I replaced them with new ones from a hardware store. New bolt hex heads fit the recess in the plastic perfectly. I used 6x40 mm. bolts vs. the original 6x25 mm. This so that there would be something to grab on to in case the hex head spins again in the plastic frame. I used the orig. 25 mm. size for the bolt near the A/C component.
I was only able to do the passenger side this weekend.
Next step - clean up the lens, hopefully this week or next weekend.
Notes re. removing the reflector basket from the plastic headlight assembly frame. Needed in order to replace rusted mount bolts. Not needed for lens + reflector cleaning.
If you do this, note the positions of the spring clips that hold on the 4 mount studs into the holes. As I recall, only one hole has a coil spring within. The others have plastic spacer bushings down inside. Watch for small parts and don't let any fall out of the holes, like I did!
Once the assembly is removed from the car, it is easy to free locked headlight aim adjustment screws. I used penetrating lubricant plus locking pliers on the exposed threads of the adjustment screws. Using locking pliers on the plastic finger-gripper knob only frees the knob from its screw, not a good approach. Cut a notch in the plastic knob with a saw to easily track # of turns as you excercise the screw to free it.
|