|
|
|
Does anyone know if the various D-jet connector boots are still available anywhere? (2, 3, and 4 pin connector widths)
Thank you.
|
|

|
|
Delete them, they do nothing but get in the way. Tape the black conduit shut and keep an eye on the wires and how the go it to the terminals. The + & - can get furry, and you can't see what is going on with the boots fitted. If you got new boots, it would be near impossibble to fit them without breaking a wire.
This guy is likely the only D-Jet expert on the net: members.rennlist.com/pbanders
--
69 142S Overdrive + 69 164S Manual
|
|
|
|
|
I agree that it will not be possible to fit new boots without removing the terminal plug and that because of age / heat induced embrittlement, the insulation near the terminal ends may crack and fall off when you do this. However, the boots do serve some purpose. They keep dirt and moisture out of the contact area and they help to shield the plug and wire ends from the heat and radiant energy from the engine which leads to ageing of the plastic.
If you don't want to fork over the $ for new boots or go through the effort of re terminating the plugs to allow for fitting new boots, you can do a partial boot using heat shrink to seal the back part of the male plug and the exposed wiring.
On some of my terminations, the wiring had failed and I could not find new crimps to allow me to splice new wire in and reuse the plugs, so I chopped off about 2-3 " of the brittle wire and re terminated the wire in a female Deutsche brand connector. I then added about 3" of wire onto the matching male Deutsche connector and terminated the other end of these wires in female 0.11" spade crimp connectors. The 0.11" connectors fit nicely onto the male terminals on the injectors and other Bosch stuff. After inserting the crimp connectors into the injector termination, I sealed that area with heat shrink. The sealed termination on the injector becomes semi-permanent (requires removal of the heat shrink if you need to replace the injector); but, the Deutsche connector allows you to easily remove the injector for replacing things like injector seals or measure voltage or test continuity of wiring.
The spade connectors that are sold by most auto stores are 0.25". You will probably need to go to an electronics supplier to get the 0.11" spade connectors. There are slightly smaller spade connectors (0.93") which might be an even better fit on the Bosch terminations; however, my local supplier didn't have them so I wasn't able to test them for fit. The Deutsche connectors can be pricey; but, they are the best male / female water resistant plug arrangement that I have tried. Fortunately I have access to a local industrial supplier who sells them at a super price and will even sell me individual crimps rather than may me purchase a complete strip. If I had to pay the price and shipping from some of the on-line vendors that I have seen, I probably would not bother.
|
|
|
|
|
However, the boots do serve some purpose. They keep dirt and moisture out of the contact area and they help to shield the plug and wire ends from the heat and radiant energy from the engine which leads to ageing of the plastic.
I've never seen dirt, water or mud on the injectors on mine or other peoples cars, I haven't seen the actual plug itself crack either and given how old they are, the originals must be high quality plastic. Unless you find a stash of NOS plugs, I would say no to replacing them with Chinese junk pieces.
If you want to worry about something, spend your time looking for real problems. At least pick wires or things that are capable of starting a fire.
--
69 142S Overdrive + 69 164S Manual
|
|
|
|
|
I've driven many dirt and muddy roads and never seen mud on the injectors. More critical is the trigger point plug, because it has very little current running through it, but iv'e seen plenty of the oil soaked plugs and swollen boots on other's cars, and they keep running. You would have to pretty silly to short out the connections at the injector. The time spent replacing the boots, connectors & replacing some of the wiring would have been better spent building a loom for a MegaSquirt.
--
69 142S Overdrive + 69 164S Manual
|
|
|
|
|
Silly or not I did replace the boots on my D-Jet, before I built a new loom for my megasquirt project using new boots. It is obvious to me that the boots (or plug covers) serve a function I also figure that the auto engineers that designed the D-Jet system used the plug covers because they had function. Its not really about mud on the injectors.
The boots protect the plug connection from water,heat, reinforce and support the wires to prevent wire fatigue, and help hold the plug securely in place.
After working on my car for 44 years, I saw that the wires were cracked and broken from heat and repeated motion. You know how old and brittle wires get weaker and break when you repeatedly move them back and forth? Well I have seen it happen on my car and another I helped rebuild. It was very hard for a non mechanic to spot the problems this caused. This wire fatigue causes big problems when just one of the connections fail. Rebuilding the connections provide better reliability when the wires are supported with the boot.
As to the issue of protection from the elements....I had to delay delivery of my car when I bought it because a numbnut power washed under the hood. The boots were broken and the car would not start until those connections were dried out.
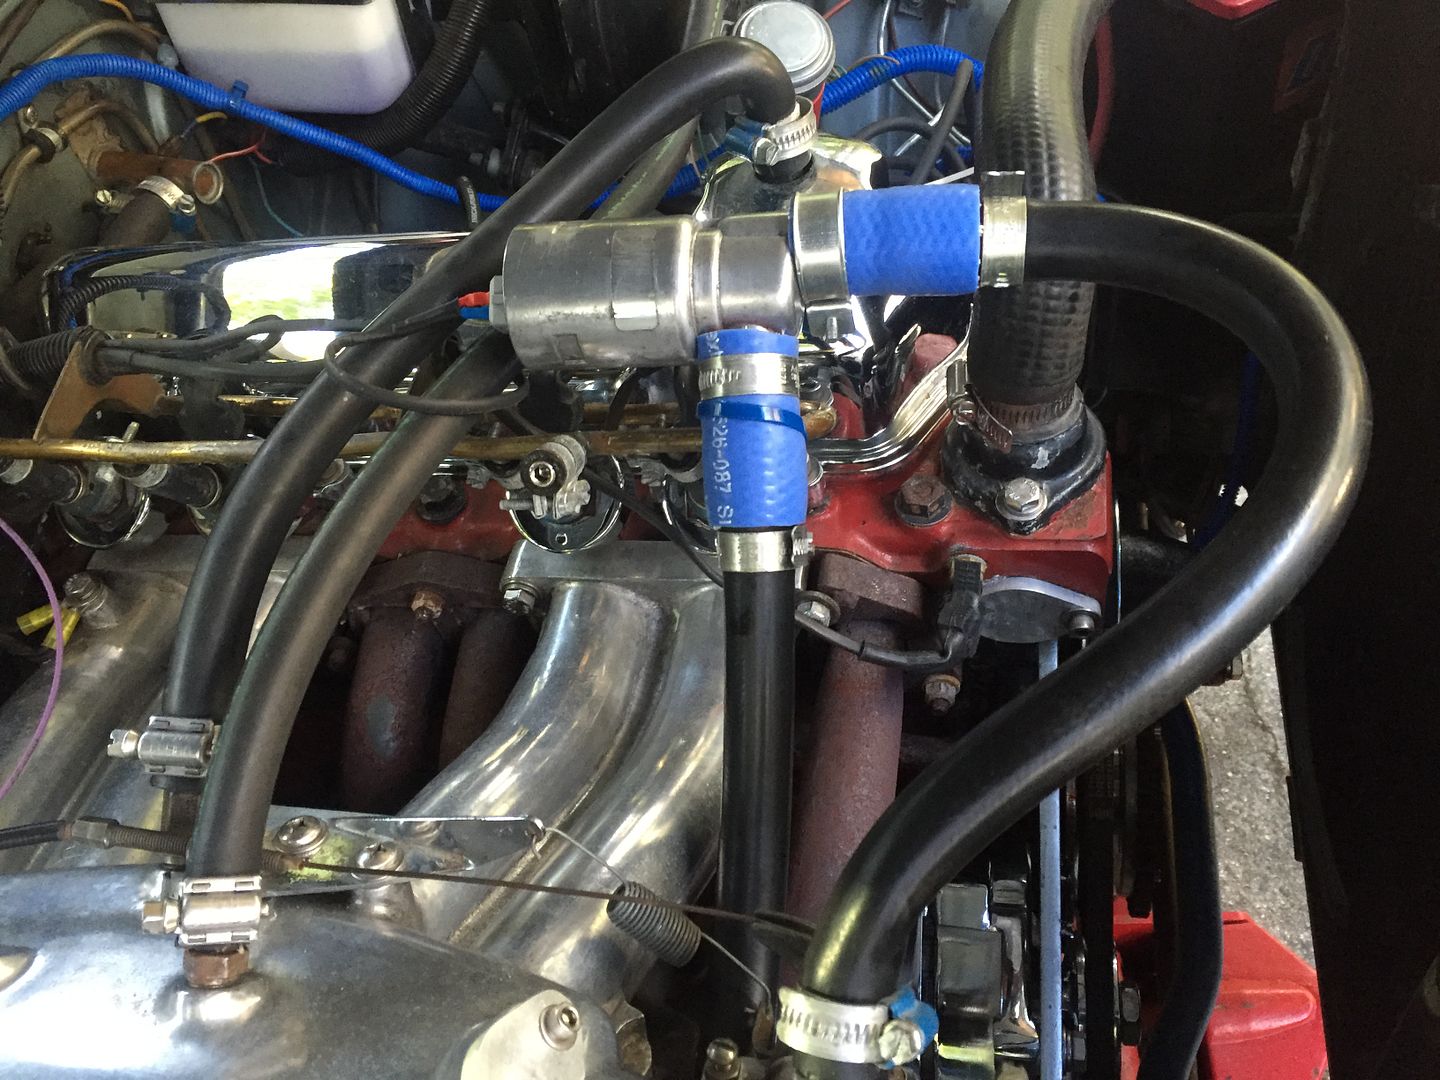
Personally, I like a clean, smart, and proper car the way it was when new. I think not having boot covers detracts from the appearance. I compete in shows (not for the ribbons) and would be at a disadvantage if I did not have the boots. Note in the illustration I still have to install a boot on the PWM idle valve. I lost my stash of boots but found them recently.
So i hardily recommend replacement of the plug covers if you can afford them, to restore the reliability and function of the D-Jet system. If you value reliability, it seems silly to me not to replace them and have an electrical failure down the road. Why take such a stance against replacing the boots?
--
Antique Swedish Steel 71 142E color V#102
|
|
|
|
|
I had a look at that and the other photobucket pics and have a few questions.
Did you replace the boots on the battery cable at both ends? The boots on the alternator? The boots on the coil + & - ?
Why did you fit the wrong coil?
Why did you mount the MS stuff above the red hot exhaust?
Why did you re-rout the fuel around the firewall like that? Volvo did it a much better way originally.
Are the new fuel pipes cad plated steel like the originals?
Why do you need the MS controlled idle valve, are you planing on fitting aircon or power steering?
Are those headers 4-1 or 4-2-1?
--
69 142S Overdrive + 69 164S Manual
|
|
|
|
|
First of all, most of the pics on photobucket are older pics, as far back as 2006.
The boots on the starter are original. I did have to use an aftermarket post terminal on the positive cable. I have no boot for it, but currently the postitive terminal is covered in corrision preventing red coating and stainless fasteners. I suppose a boot, for the positive terminal would be a good modification. I could not find such a boot earlier at the autoparts store, I should search on the net for one. Thanks for pointing that out.
I have an EDIS style dual coil now. There is no + or - .
The MS "stuff" is on the other side of the firewall away from the heat of the exhaust, as is the WB02 sensor equipment. What you might be referring to MS relay board, which is suitable for use in the engine bay. It is a convenient point to manage the connections of MS input and output. The relay board actually is not placed directly over the red hot exhaust. I have seen my exhaust headers red only one time about 35 years ago when I ran it hard one night with high octane airplane fuel. That was a sight.
The 1971 142E originally had the FPR located on the firewall in the same location I now have my aftermarket FPR with gauge, with its vacuum hose. I liked the original FPR location, avoiding the vibrations found with the fuel rail mounted FPR found on the 72-73 140s. The vacuum hose management also used with MS is easier to manage in this location as well. I am not sure why Volvo engineers selected this firewall location for the FPR, but it works for me. The rubber fuel line routing and metal fuel lines are all original. The metal fuel lines are not new, and so yes they must be cad plated, thanks for the compliment. You see, since 1976 I have kept it clean. I use new fuel line tie down clamps from Volvo, they are even marked with "Sweden". The only real modification made to the fuel line system from stock is that I have eliminated the charcoal fuel vapor canister return line that ran parallel with the two fuel lines you see. So I would guess from your questions you disagree with the original Volvo fuel system design found on my car.
I am using the PWM air valve to give me some extra air when the motor is cold, my motor is simple without AC. The motor starts like new without it during the summer but during the colder months my starting is impaired without this device. This modification is recommended by MS to give "new car" starting during cold weather.
My headers suck, they are 4 to 1. I bought those before I knew better. I have the original 4-2-1 exhaust which I am going to clean up, have an WB02 bung installed and use again when I have another 73 B20E head flowed. I'll let my mechanic/wizard make the call about matching up the two.
I do not have boots on my alternator connection. I run an ACDelco 3 wire 100 amp. There is only one post connection, and the other two wires are plugged into the alternator itself. I shield my harness with reflective covering. I think the 4 to 1 headers put too much heat on the alternator and its harness. I think my original 4-2-1 exhaust will perform better, and fit better. Mounting the B20E intake with the IPD 4-1 headers is difficult as well.
Thanks for your interest and comments.
--
Antique Swedish Steel 71 142E color V#102
|
|
|
|
|
I have seen my exhaust headers red only one time about 35 years ago when I ran it hard one night with high octane airplane fuel.
The exhaust runs red hot for the first foot of pipe after the head ever time you have your foot near to or flat to the floor for more than a few seconds. Not as problamatic with stock 4-2 exhaust manifold, but I broke the 2-3 secondary on a dyno run. You will rarely see a red exhaust jumping out the car and diving under the bonnet, it's something you see on the dyno where you can watch your motor at full noise for extended periods.
Also, airplane fuel runs cooler and B18 140's had the highlight flasher/relay there and moved it to the inner mudguard. I'd move the MS relays to inside the car.
I am not sure why Volvo engineers selected this firewall location for the FPR, but it works for me. The rubber fuel line routing and metal fuel lines are all original. The metal fuel lines are not new, and so yes they must be cad plated.
I would change to Volvo's later version. 1st, that short length of hose from the injector rail to the firewall would be inlined to crack due to the inline 4 shaking left, right and especially up and down is going to become a fire hazard very fast. 2nd, the later injector rail was a leap foward because each firing injector has an equal supply of fuel. If your FPR is single entry, then you need a fuel rail that is 1/2" with 5/16" in, out and injector lines to give equal pressure to all injectors. You would have noticed that the modern versions which have the injectors attached directly to the rail have a BIG hole through them which functions as a plenum for the pressurized fuel.
With the stock exhaust, I would elongated the secondaries to the 2nd harmonic in length, thay then need to go in to a tuned length of 2.125", then that slides in to your 2.25" or 2.5" exhaust. OR, if you have a 2.5" exhaust, a megaphone might be worth the effort fron the secondaries to the 2.5" exhaust. Either the collector or the megaphone will fall into the 12" to 18" length depending on details.
4-1 Headers use to be for engines with a maximum head, HUGE cam, dual DCOE's or injection with dual DCOE injection throttle bodies. Now every NASCAR engine has a modern style of 4-2-1 as do the majority of NHRA Pro Stock, engines that run to 9500-10000 rpm.
I like the original exhaust manifold 1st, because it creates a unique sound and 2nd, it dampens out alot of the anoying treble frequencies. 3rd, as I said above, there is room for improvement on the secondaries and collector or megaphone.
There is only 2 brands of header that I like the look of, I is a Swedish 4-2-1 which had 1.5" primaries, the other is BHP's 4-1 which are 4-1 with 1.5" primaries stepping up tp 1.625". The BHP headers are intended for ITB racers, but I think they need an upgrade to a merge collector. The VPD headers look like something I made in 1991. The IPD 4-1 headers look like junk as do most of thier products.
--
69 142S Overdrive + 69 164S Manual
|
|
|
|
|
Thanks guys for the insight/suggestions. Here again, Planetman has the correct crimp contacts, plastic connectors, boots, etc., etc.
--
Current rides: 2005 Volvo S80 2.5T, 2003 Volvo V70 2.4NA, 1973 Volvo 1800ES (fixed the ignition - now back to the brakes again)
|
|
|
|
|
A few things about the plug rebuilds.
With the spade connectors, if the female connectors don't clamp tight on the spade your connections will work loose with engine vibrations. Develop and test your technique.
Make sure the boots are fitted on the harness so that they fit around the plug receptacle lip. Too short and it tends to work out the plug. Done right the boot helps to hold the plug firmly in the receptacle.
Make sure each crimp fitting retainer tab is adequately extended to properly interface with the plug.
My two cents worth. Its a fun project with great results. Glad you are doing it for the reliability of your system.
--
Antique Swedish Steel 71 142E color V#102
|
|
|
|
|
Try VP autoparts or Planetman. They are made, but imported, so they are pricey. PM me if you need numbers.
So......are you reworking the crimped terminals? Were the trigger point connections intact? I had the same failure years back.
--
Antique Swedish Steel 71 142E color V#102
|
|
|
|
|
I've got the Bosch part numbers but thanks. Planesman thinks he may have a set. I found a set at CVI for 51 yankee bucks plus 36 shipping - ouch.
I went back through things and cleaned the trigger points, checked them for good make/break and verified the wiring back to the controller. I had the distro out of the engine, trigger harness connected, and ignition "on". I could spin the distro rotor and hear both banks clicking - two clicks per distro rev. I have the injectors pulled out but still connected to the fuel lines and wires connected. When I crank the engine over all 4 are producing a fuel spray but it appears that #3 and #4 aren't flowing an equal volume to #1 and #2. I'm in the midst of devising four capture tubes made from clear 1/2" hose by which I can make a good comparison of the fuel flow volumes.
I was just noticing how brittle and cracked all of the boots are so thought I'd ask about their availability - you know, in case I get this thing running so smooth that I feel like I should spruce it up a bit. I'm assuming that all of the connectors can have their contacts unseated with a tiny screwdriver so that the boots can be R/R'd.The crimps appear to be fairly sound.
|
|
|
|
|
Chris,
To make your car safer and more reliable, I would make a project of replacing all the boots and at the same time putting new crimp terminals on wires. 45 year old wires exposed to heat fail easily, not all fail, but a lot do. Those small breaks are vexing gremlins and hard to diagnose, hidden under the brittle hard boot. A little tech tip I did not know until I replaced the terminals, the white wires are numbered as on the wiring diagram in the Green Book. So when you do the project, if you have a diagram, you wont muck it up.
Buy the boots from and support Planetman's business. He is always willing talk and help as well, a good resource. He knows where to get our parts and I am willing to pay him to find parts for me.
Yes the tab of the terminal is pushed down from the front of the plug with small screwdriver, and you simply remove the terminal from the back of the plug, as you are depressing the tab.
Good work on the diagnostics. Perhaps you need to have your injectors cleaned, flowed and tested. Cruisin Performance is noted in the forum. I sent mine to him 9 years ago and got back reports and flow rates for each injector after he cleaned it up. Most folks are using him for this purpose, his service is proclaimed throughout the land.
Consider fuel line or tank debris is clogging your injectors. If you havent done it already, check your filter and lines for debris. I read somewhere that someone with a B20 reports the ethanol is causing rubber breakdown in fuel lines with particles seen.
Thanks for sharing too. It is interesting for me to see us non Mechanic "McGiver" types working through these problems and their solutions. Nobody but us on the forums are into these cars, the knowledge base is shrinking here in the US.
--
Antique Swedish Steel 71 142E color V#102
|
|
|
|
|
I support the comment about checking the condition of the wires at the terminations. The wiring on my injectors and on my Coolant sensor was very brittle at the ends where it went into the terminations. Disconnect them a few times and the insulation will crack and fall off. I expect that yours will be the same and you should probably plan to have to do some repairs, so you will need replacement crimp terminals. If you need to splice in some new wire on the ends, try to get a GXL, SXL or TXL wire type with cross link insulation. They are rated for 125 C operation. The primary difference between the three is the wall thickness of the insulation, TXL being the thinnest. Avoid the GPT class wire which is the most common, it is only good for 80C. The best wire would be Teflon insulated stuff; but, it is pretty hard to source.
|
|
|
|
|
I should have a full set of the dust boots for a 4 cylinder engine. The set has 10 dust boots, 7 for the 2 wire connectors, 1 for the 3 wire connector and 2 for the 4 wire connectors.
I will have to check when I get back to work in the morning.
IIRC, the set costs around $75.00.
--
Eric
Hi Performance Automotive Service (formerly OVO or Old Volvos Only)
Torrance, CA 90502
hiperformanceautoservice.com or oldvolvosonly.com
|
|
|
|
|

